If you want to glue boards together, then you'll need glue. Glue can also be applied to one side of a joint. A roller makes it easy to apply a thin layer of glue. Let the glue dry on the boards for at least 24 hours before moving onto the next step. Any glue that is still oozing can be cleaned with damp cloth. The glue should be removed with either a chisel, or sandpaper. Do not skimp on curing!
Gluing boards from both sides
The finished product will be flat and even if glue boards are used from both sides. But don't rush. This is a delicate task so you should take it in steps. These are some tips that will ensure you have a successful outcome. Make sure your board is level and not buckling. Use the right amount of adhesive.

Apply glue to the edges of a joint
There are many advantages to glueing joints. It strengthens the joint and prevents it bending or cracking. Because glue is invisible, the edges of the joint are smooth and straight. Also, spread a generous amount glue evenly throughout the joint. The joint can be strengthened by applying clamps at regular intervals. This will ensure a thin but strong glue line. Another option is lap joints. They offer a lot more gluing surface. These methods are great for this type.
A board can be made thicker by adding thickness
When gluing multiple wood boards together, you should always add some thickness to each board. The wood pieces will appear plywood-like if you don't. Multi-layered wood will give your final product a different appearance. It is important to consider the grain when glueing boards together. A bad match of grain will ruin your project's beauty. To avoid this problem, buy boards from the same log and a bit extra for waste. You can also make use of the stock you already own.
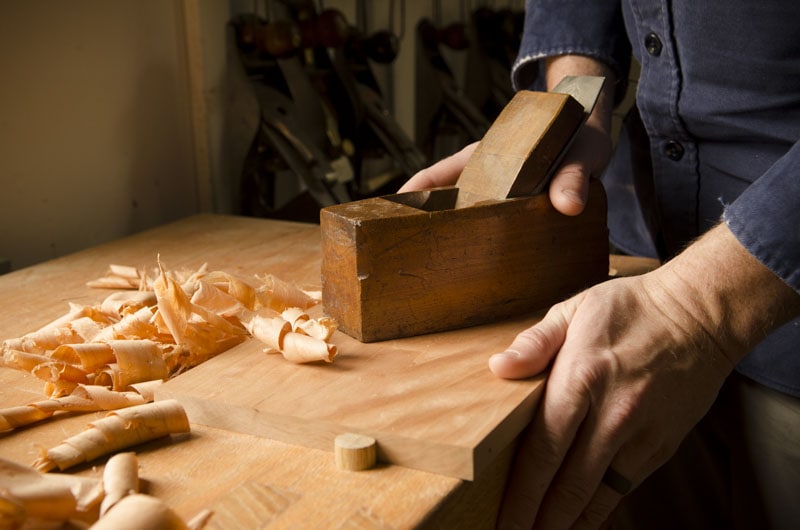
A caul can be used to glue boards
Cauls are a great way to secure a strong bond and flat surface when glueing boards. A caul is simply a piece made of hard wood, which you attach perpendicularly to your table's top. Cauls should not be made of softwood and should be thicker at the glue seam. You can use a caul to glue board in several ways.
Avoid flexibility in cauls
For boards to be glued together it is essential to not allow the cauls to flex. This will prevent them from bowing. Cauls are curved and apply inward pressure. This can cause edge to edge boards to bow, even if they're symmetrical and the cauls are of the same stiffness. This can be fixed by making sure the edges are square and using a proper adhesive.

Creating mirror image grain patterns with edge-glued boards
Edge-glued boards are made by combining two pieces of wood with mirror image grain patterns. They're most often used for veneers, but can also be created from solid boards. Resawing a piece of wood, and then joining the pieces using glue is what this process entails. This article will show you how to achieve this effect using a few simple techniques. Continue reading for more information.
FAQ
What tools should you start with to become a woodworker
Woodworking takes practice and patience. It takes time for you to master the different techniques and tools that are required to woodwork.
There are many kinds of woodworking equipment currently on the marketplace. Some prefer to use power tools and others prefer hand tools.
Your choice, however, is up to you. However, you need to ensure that the tool you use is the right one for the job. It may be a good idea to start with a basic set, if possible, if you don’t know much about hand tools.
You might also want to learn how a router works, which allows you to cut wood into intricate shapes. These routers can be purchased at most hardware and home improvement stores.
How can you calculate woodworking pricing?
It is essential to calculate costs as accurately as possible when pricing any project. Always make sure you get the best price on materials. Also, consider all other factors that can affect the price of your projects such as skill level, experience, time and cost. You can find an estimate of the cost of different woodwork projects in our guide to common DIY tasks.
What is the difference of plywood and particleboard?
Plywood is a combination of layers of wood, which are then pressed together under high pressure. Plywood comes with a range of thicknesses, and it is most commonly used for flooring and cabinets. Particle board is made up of sawdust mixed in resin, then compressed into large pieces. It's used for home improvement projects. Both types of boards can be easily cut and are durable.
What kind of tools are used to carpenters?
Carpenters use a hammer as their most common tool. A hammer can be used to drive nails into wood. It is also used to help hold pieces together while working on a job. Other tools include clamps.
How much should a woodworker charge per hour?
The hourly rate paid to a professional woodworker is dependent on many factors. These include skill level, availability, and location.
The average hourly rate for a skilled woodworker ranges from $20-$50 an hour.
A woodworker with less experience may be able to charge $10 an hour.
What is the minimum investment a hobbyist needs to make in order to get started?
A lot of capital is required to purchase the necessary supplies and tools if you want to start your own woodworking shop. A good place to start would be by buying a small table saw, drill press, circular saw, jigsaw, and sanding machine. These items don't cost much so they won't break your budget.
Statistics
- The best-paid 10 percent make $76,000, while the lowest-paid 10 percent make $34,000. (zippia.com)
- If your lumber isn't as dry as you would like when you purchase it (over 22% in Glen Huey's opinion…probably over 10-15% in my opinion), then it's a good idea to let it acclimate to your workshop for a couple of weeks. (woodandshop.com)
- In 2014, there were just over 237,000 jobs for all woodworkers, with other wood product manufacturing employing 23 percent; wood kitchen cabinets and countertop manufacturing employing 21 percent. (theartcareerproject.com)
- Average lumber prices rose about 600 percent between April 2020 and May 2021. (familyhandyman.com)
External Links
How To
How to drive a nails in wood
The first step in driving a nail into wood is to choose the correct size and type of hammer. The most commonly used types of Hammers are claw hammers. Each kind of hammer has its own advantages and disadvantages. A claw hammer is best for hitting nails or hard objects. However, it can be difficult to pinpoint exactly where the blow will land. A sledgehammer is useful for striking large areas at once but too heavy to be effective for smaller tasks.
Place your hand flat on the side of your chosen hammer so that the handle rests in your palm. You can grip the handle with your fingers, but not so tight that it causes injury. Your wrist should be relaxed while you hold the hammer straight upwards. Swing the hammer back towards the ground, with your aim at the middle of the nail. You should feel the impact on the nail from the hammer. You can practice swinging the hammer with a block or wood until you feel the rhythm.
The hammer should be held close to your body when you are ready to begin driving the nail. Position the nail, so it's perpendicular to the surface of the wood. Keep your focus on the tip of each nail. Then, swing the hammer forward. Next, follow the motion of your hammerhead. Repeat this action several times, gradually increasing the speed of the swing. Try adding power to your swings when you've mastered the technique. You can hold the hammer over your shoulder and forcefully bring it down. This will help you put more energy behind each of your moves.
Once you've made the first nail hole, take out the hammer. To pull out the remaining nails, use a screwdriver or pry bar. To avoid splitting the wood, make sure the nail heads are not touching the board's surface.