
There are many types of joinery wood. There are three types: the Mitered andt joint, the Tongue & groove joint and the pocket-hole. Let's take a closer view of them. Once you are familiar with the functions of each, it will be easy to create a beautiful and functional table. This article will show you how to use the best joinery wood techniques. This article will help you feel confident and more informed about their advantages and applications.
Mitered butt joint
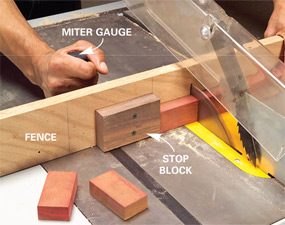
Common joinery used to join wood pieces is the mitered butt joint. This joint uses two boards, each with 45-degree cuts on one end to create a 90-degree corner. This joint is useful for creating irregular shapes. Its strength is the same as a traditional wooden butt joint. It is not as strong, however, as edge-to–edge joints.
A mitered butt joint can be held together using glue or nails. To prevent splitting, drill a pilot hole before mitering. Alternatively, you can use a pin nailer, a pneumatic tool that uses tiny brad nails to hold the wood together. The heads of these nails are very small, and they disappear once the wood is glued in place.
Mitered groove joint
A mitered groove joint made from joinery wood is 45 degrees in angle. A miter joint can be made by joining two pieces of wood together and then cutting the grooves in the wood while it is still square. Making the cut while the wood is still square makes the job safer and much easier. Once the grooves are cut, place a spline into the gap. Attach the spline with glue, nails, or screws.
The Mitered groove joint is another variation of the traditional biscuit joint. You create it by carving a groove on one of the pieces of wood and then glueing them together. This type of joint is commonly used for solid panels made with different types of wood. Because the joinery is invisible, it can be more difficult to spot than a conventional wood joint. It is important that you cut the biscuit joint from the same side of the wood as the one being joined.
Tongue and groove joint
The common tongue and groove joint in joinery is the most popular, however there are many methods to make it. A tablesaw is a good choice for creating this type joint. The blade can be used to cut through the grooves with a single pass, while the dado stack can be created in one pass. A router table, on the other hand, is quick and efficient and allows you to use matching bits to make a tight tongue and groove joint.
A tongue and groove joint allows you to connect pieces of wood that are very similar. This type of joint can be found in high-quality cabinetwork but is also used for other purposes. This joint is also used for some wood flooring types, such as architectural paneling and cabinet doors. It is easy to assemble and can be used as a drawer tracking. If you're not confident with tools and can't afford to hire a joiner, you can make your own with a simple plane or saw.

Pocket-hole joint
The most common type of pocket-hole joint is made of wood. It can be used on two of three sides of the wood, which is the face and the edge grain. However, it can not be used on any end grain. It is therefore important to learn how to use pocket hole joinery, and how to adjust the stop collar or jig to achieve a perfect fit. For beginners, pocket holes joinery is a great way to make a joint.
A pocket-hole joint can be made by drilling a hole in a piece wood at least one-half inch deep. The pocket-hole drill jig allows you to drill these holes at a precise angle of 15o. You will need a cordless drill to use a pocket-hole jig. You can also use the Porter-Cable P560 pocket-hole tool.
FAQ
What kind of wood should you use?
Oak, maple, cherry and mahogany are the most common wood types used for woodworking. Each wood type has its own characteristics which affect the final product's appearance and feel. Oak, for example, tends be darker and more hard than other woods. Birch is soft and light, and mahogany is denseer and heavier. You can also choose between solid wood and veneers. Veneers are thin wood sheets that are glued together to form one layer.
How much money do you need to get going?
Each project is unique so there aren’t exact numbers. These factors will help you get an estimate of how much money is needed.
-
Material costs
-
Tools and equipment
-
Time spent on the project
-
Hourly rate
-
How much profit can you anticipate to make
-
It doesn't matter if your goal is to hire help
Start small, if possible. You can make simple boxes or picture frames if you're just getting started. As you gain experience, more difficult projects will become possible.
How can I learn basic woodworking skills
Building a bench is a great way to get started in furniture building. You can do this project using any type of wood you have on hand at home. You don't need to know which type of wood you should use. Instead, get some pine boards at Lowes or Home Depot. Once you have built your bench, you will need to sand it off and then finish it with a stain/varnish.
How do I calculate woodworking prices
The most important thing to remember when calculating costs for any project is to keep them as low as possible. Always make sure you get the best price on materials. Also, consider all other factors that can affect the price of your projects such as skill level, experience, time and cost. Check out our guide on the average cost of common DIY projects to get an idea of how much you can spend on woodwork projects.
What furniture can I refinish?
Yes! There are plenty of ways to refinish old pieces of furniture without having to pay a pro. Here are some ideas:
Use sandpaper to remove scratches and stains. Finally, use a clean cloth or sponge to clean the surface.
Apply clear polyurethane finish. Allow furniture to dry completely before you move it around.
Use acrylic paint to paint furniture.
Stain can be used instead of paint. The furniture will get a rich look with the stain.
Apply shellac wax. The wax will add shine to the wood and protect it.
Statistics
- Woodworkers on the lower end of that spectrum, the bottom 10% to be exact, make roughly $24,000 a year, while the top 10% makes $108,000. (zippia.com)
- The best-paid 10 percent make $76,000, while the lowest-paid 10 percent make $34,000. (zippia.com)
- Most woodworkers agree that lumber moisture needs to be under 10% for building furniture. (woodandshop.com)
- The U.S. Bureau of Labor Statistics (BLS) estimates that the number of jobs for woodworkers will decline by 4% between 2019 and 2029. (indeed.com)
External Links
How To
How to join wooden boards without using nails
Woodworking is a popular hobby. Woodworking can be a fun hobby because you can work with your hands to make useful objects from wood. However, there are times when you want to join two pieces of wood together without having to use nails. This article will help you to maintain the beauty of your woodwork projects.
You will first need to trim the edges of your wood pieces before joining them. Avoid leaving sharp edges that could lead to problems later. Now you can start gluing the boards together.
If you're working with hardwood, you should only apply glue to one side. For softwoods like cedar and pine, glue should be applied to both sides. Once the glue has dried, press the boards together until they are fully adhered. Be sure to let the glue dry before you move on to the next step.
After you glue your boards together, drill holes at the joints where screws will be inserted. Depending on what type screw you choose, the size of these holes will depend on how big they are. For example, if your screw is a 1/2-inch wooden screw, drill a hole that is at minimum 3/4 inches deep.
After drilling your holes, drive the screws into the board's backside. Do not hit the boards' front surfaces. It will ruin the finish. Don't drive the screws too far into the end. This will prevent splitting in the end grain of the wood.
After your project is completed, you will need to protect it from the weather. You can either cover the entire furniture or just the top. You want it to last years, so you can use any product. There are many options: oil-based varnishes; polyurethane; shellac; lacquer.
These products are available at most home improvement stores. Be sure to choose the right one for your project. Keep in mind that certain finishes can be toxic and should not be used indoors. Always wear protective gear when handling any of these finishes.