There are many types of pen mandrels available. Here are the different features to look for, as well as cost and installation. These mandrels are a great way to protect your writing tools and add professional flair. Read on to learn how you can purchase one for your art studio. And be sure to check out my other articles for more tips and advice.
Features
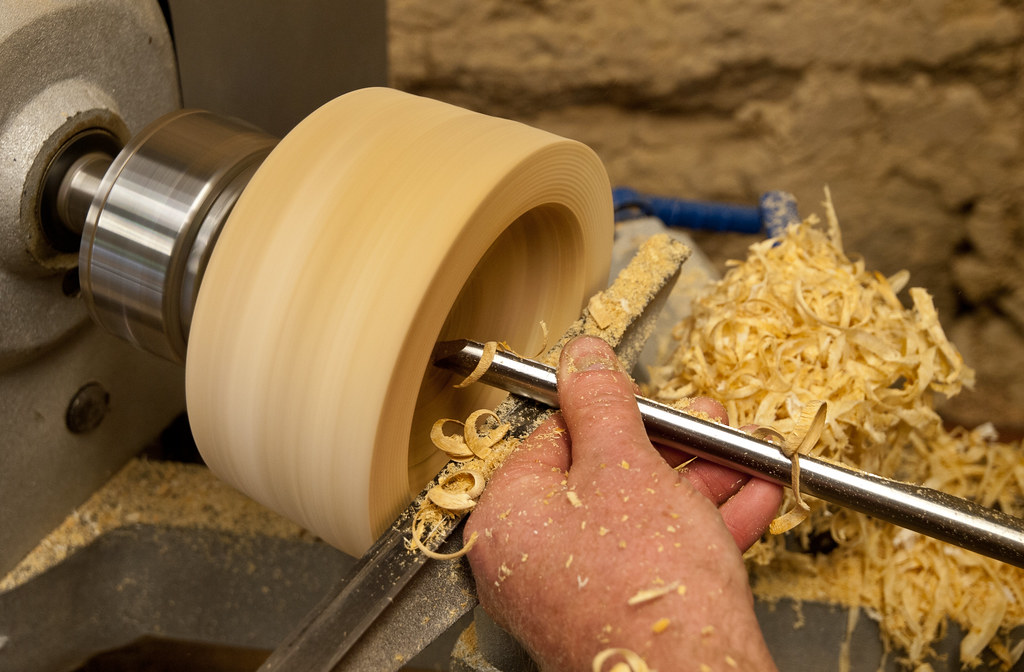
Pen mandrels may be very useful for turning different types and types of pen. For instance, WoodRiver Professional Pen Turning Mandrel comes with a 7mm shaft that can slide through the headstock collet. This features self-centering, which eliminates the need for spacers when turning short projects. The 5 bushings on this mandrel will keep it from bowing and make it a versatile tool that can work on many projects.
Pen mandrels are prone to bow and bend when they are tightened. This happens because the mandrel enters a hollow, live center which presses against its shaft and center. The pen mandrel tube and bushing assembly are tightened by a tailstock quill adjustment wheel. This feature is excellent for beginners as the tailstock quill adjustment wheel tightens the pen mandrel tube and bushing assembly.
Options
No matter if you are making a custom pen, or a kitless pen, you need to have options for mounting your components. Made of solid brass, mandrels are strong enough to hold 15mm of rear tension. A live mandrel saver allows you to attach a pen mandrel directly to your tailstock. They are simple to attach and remove and will slide through the center bore of a live center nose. These mandrels can be mounted and adjusted easily and are extremely secure.
There are many options available for pen mandrels, so it's easy to find the one that fits your needs. If you're looking to make pens for beginners or for more advanced users, a set of adjustable pen mandrels is a good choice. You can adjust the length of your pen barrel, making it more precise than ever. The adjustable pen mandrels can be more costly than fixed ones but they are less likely to cause over-tightening which is a common mistake for rookies.
Cost
For turning blanks, pen need a mandrel. Bushings, which are steel round pieces that slide on top of the blanks and can then be turned to the proper size, are made from stainless steel. Each kit needs a specific bushing size. The bushing number is followed by a letter. Although it is not often required, a B mandrel is sometimes needed. These mandrels can be equipped with bushings or other additional features.
Mandrels are available at different prices. A basic model can cost between $12 and $15. You can also buy mandrelbushes separately, if needed. You won't find them cheaper elsewhere. Some mandrels will not work with other bushings. Before buying, check out the warranty information and customer reviews.
Installation
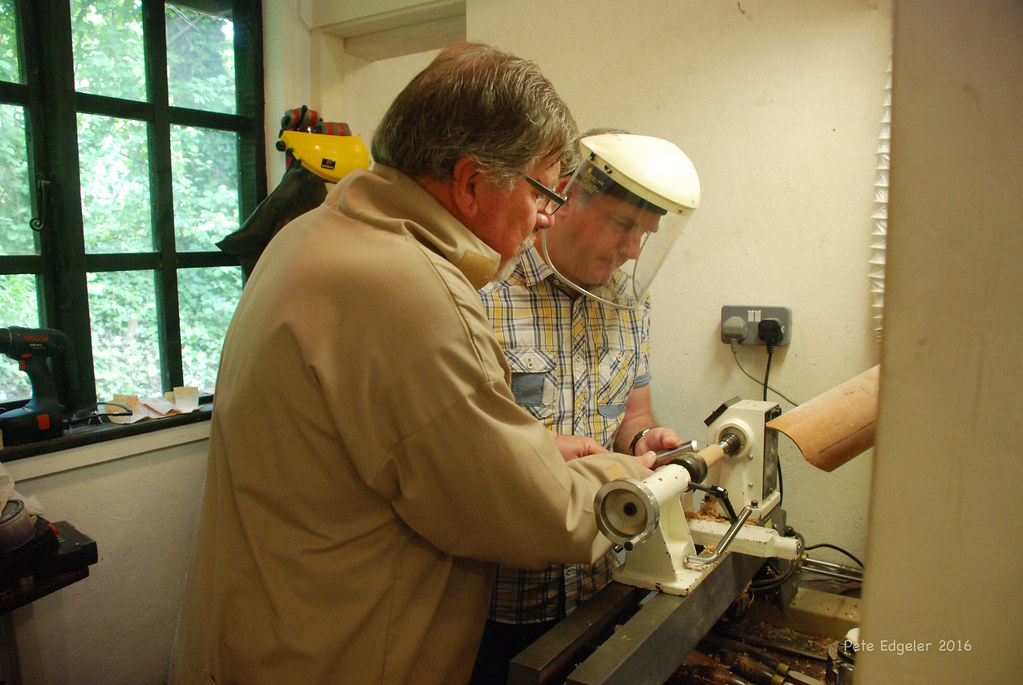
It is crucial to install pen mandrels in order to make high-quality custom pens. These special pieces of equipment can be used to hold the rear tenon for a 15mm pen kit. The mandrels also help you make pens with both internal and external threads. Use these tools together with your lathe for the best results.

The Whiteside Pro Pen Mandrel System uses technology similar to modern CNC machines to create a superior grip on the mandrel. It also allows for easy adjustments for different-length projects, reducing the chance of mandrel shaft bowing. These tools can be used to turn different length projects including smaller key chains, smaller pen sizes, and larger pen sizes. Make sure you tighten the nuts on your mandrel properly to ensure a flawless installation.
FAQ
How long does it usually take to complete a piece furniture?
It depends on the type and complexity of your design as well as the amount of finishing that you use. Hardwoods are more difficult to maintain than softwoods. Hardwoods can also be more costly than softwoods. However, they are stronger and more resistant to moisture. It takes between one and three months to finish a piece.
Can I refinish my own furniture?
Yes! Yes! There are many methods to refinish antique furniture without hiring a professional. Here are a few suggestions:
Use sandpaper to remove scratches and stains. After that, use a clean towel to wipe the surface.
Apply clear polyurethane finish. Allow to dry thoroughly before moving furniture.
Acrylic paint can be used to paint furniture.
Instead of using paint, stain is a better choice. You can give your furniture a rich appearance with stain.
Use shellac wax. This will protect and shine the wood.
What's the difference between plywood vs particle board?
Plywood is a combination of layers of wood, which are then pressed together under high pressure. Plywood comes with a range of thicknesses, and it is most commonly used for flooring and cabinets. Particle board is made of sawdust and resin that has been compressed into large blocks. This board is commonly used in home improvement projects. Both types of boards are durable and easy to cut.
How do I get started with woodworking?
Building furniture is the best way to learn how furniture is made. You'll need tools, and you'll have to make mistakes along the way, but if you keep at it, you'll eventually figure out what you're doing.
Start by choosing a project you'd like to complete. It can be as simple as a small box, or as complex as a complete entertainment center. After you have decided on a project to work on, contact a local woodworker that specializes in this type of work. Ask them for suggestions on the tools you will need and where to buy them. You might even ask whether there's someone else you can talk to who does this kind of work.
Statistics
- Overall employment of woodworkers is projected to grow 8 percent from 2020 to 2030, about as fast as the average for all occupations. (bls.gov)
- The best-paid 10 percent make $76,000, while the lowest-paid 10 percent make $34,000. (zippia.com)
- Most woodworkers agree that lumber moisture needs to be under 10% for building furniture. (woodandshop.com)
- If your lumber isn't as dry as you would like when you purchase it (over 22% in Glen Huey's opinion…probably over 10-15% in my opinion), then it's a good idea to let it acclimate to your workshop for a couple of weeks. (woodandshop.com)
External Links
How To
How to stain hardwood
Staining wood is the process of applying chemicals to the wood's exterior, which alters its color. This chemical reaction changes the wood's color from white to brownish. Oak is the most commonly used wood for staining, but other woods can also be stained.
There are many methods to apply stain to wood surfaces. Some methods involve mixing the stain with a solvent (such as turpentine) and then brushing or spraying the mixture onto the wood. Others use a solution made up of water and dye, which is then applied directly onto the wood. Stains can also be mixed into paints and varnishes, becoming part of the finish coating.
Preparing the wood surface is the first step to staining it. To apply the stain, clean the wood completely. Sanding can smoothen out scratches and uneven spots. The next step is to choose the stain type you want. There are two main kinds of stains available: non-penetrating stains and penetrating. Penetrating stains penetrate deeper into the wood than non-penetrating ones, making them ideal for dark colors such as mahogany. Non-penetrating oils work best when used with light colors, like maple.
After choosing the type and application method you prefer, gather your tools. Because you can spread the stain evenly with a paintbrush, it is ideal for applying them. After you're done painting, make sure to have some rags handy to remove any excess stain. If you plan on mixing the stain yourself make sure that you have enough containers to hold the different components.
Once you have prepared your materials, start by cleaning the area where you plan to stain the wood. To remove dirt and dust, use warm water and soap. You can wipe down the entire furniture using a damp rag with clean water. Make sure you eliminate any loose debris, especially if you plan to stain darker wood.
Next, spray the stain. Next, apply the stain to the furniture by starting at one end. Slowly and carefully move along the grain of wood, slowly but steadily, until you reach the other end. The stain should not drip off of the wood's edge. Allow the stain to dry completely before you move on to the next step.
Protect the painted surface with a coat polyurethane paint sealant. Three coats are recommended for polyurethane. Allow the third coat to dry overnight before sanding the final coat.