Whittling is a great way for wood carvers to personalize their work. This guide shows how to create Uncle Sam, Santas and Leprechauns using a range of tools. These pencils are easy to follow with step-by–step photos. The author also offers advice on how to select the best micro-mini carving tool. He also offers tips on choosing over-sized pencils as well as basic details about painting and facial hair.
Dale Vander Linden
Dale Vander Linden (81) still makes pencils despite his years. He has been making them for more than 60 years and was even a US Navy veteran during the Korean War. Vander Linden is survived in death by his wife, Cherry Vander Linden (61 years), sons Stephen & JoAnne, as well as brother Pete. His parents Guy Vander Linden (Katie) and brothers Keith, Don,, and Keith preceded him in death.
Dale Vander Linden's whittling pencils
While carving his Santa Claus, Dale Vander Linden often uses rolling pins and pencils to create the Santa. He spends his days carving Santa Claus Claus with pencils and other materials at 81 years of age. While it would be tempting to use a carver’s kit to carve Santa Claus's face, he prefers to use the rolling pin.
Wood carving techniques
There are many wood carving methods that you can choose from to make your pencils. Natural oils can be used to finish your wood carvings. This is one of the easiest methods. These oils protect the wood form from dirt and moisture. Gloss varnish is not recommended as it can create a shiny, distorted surface which will confuse the observer. Another technique is the use of wax, which gives pencils a soft, lustrous sheen. This technique is most suitable for indoor carvings.
Consider the type and purpose of your carving. Choose a wood with fine grain and very little figure for detailed carving. Fine detail may be difficult to read if there is a lot of figure. Next, you will need to pick the right tools. You'll need safety goggles and Kevlar work gloves. These will protect your hands from the wood chips and keep you from scratching it.
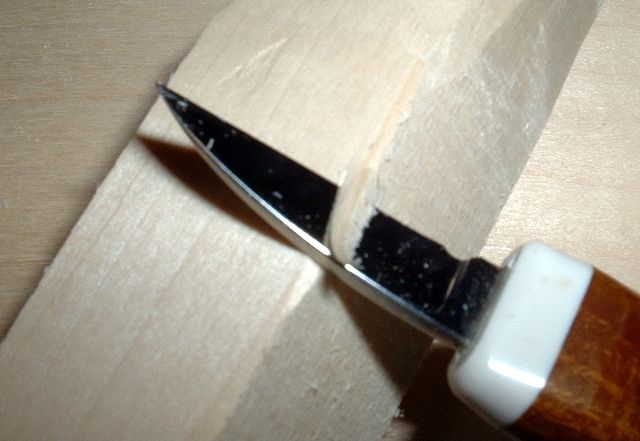
Sanding the edges and ends of whittling crayons

Wood carving is an extremely popular form of decoration. This method typically involves carving a wooden plaque or tablet. Sanding the edges of these pencils can improve the look and feel of the finished product. Regardless of the purpose for which you plan to carve the wood, these pencils can prove very useful. To achieve a smooth and sharp surface, you must first sand the edges of these pencils.
Start by making divots into the graphite base. Once you've done that, you can use a number two pencil to make the marks. Repeat the process until you are satisfied with the appearance and feel of your pencil. After the carving process, you can apply hot-melt glue to the pencil tip and re-carve it.
FAQ
Do you have any tips on starting a woodworking business?
It's not easy to start your own woodworking business. However, if you are passionate about your hobby you will be willing to put in the effort. Plus, you'll probably enjoy the challenge of running your own business.
Remember that you may encounter unexpected problems when starting a new venture. For instance, you might run out of money unexpectedly. Perhaps customers won't pay you as much as you had hoped. You must be ready to deal with such situations in order to survive.
One good tip is to set up a separate bank account specifically for your business. You'll be able to track how much money comes in and out.
How do I get started with woodworking?
You can learn the most effective way to build furniture by actually building it. You'll need tools, and you'll have to make mistakes along the way, but if you keep at it, you'll eventually figure out what you're doing.
Start by choosing a project you'd like to complete. You could make something as simple or complex as a box. Or you could build a whole entertainment center. Once you've settled on a project find a local skilled woodworker. Ask them for their advice about the tools and where they can be found. Ask if you can find someone who does this kind work.
Where can I locate free woodworking plans
Woodworking plans can be found online without the need to purchase books or magazines. Search Google for free woodworking plans. Simply type "free woodworking” into the search box and you'll find hundreds of websites that offer free plans.
Statistics
- If your lumber isn't as dry as you would like when you purchase it (over 22% in Glen Huey's opinion…probably over 10-15% in my opinion), then it's a good idea to let it acclimate to your workshop for a couple of weeks. (woodandshop.com)
- The U.S. Bureau of Labor Statistics (BLS) estimates that the number of jobs for woodworkers will decline by 4% between 2019 and 2029. (indeed.com)
- Average lumber prices rose about 600 percent between April 2020 and May 2021. (familyhandyman.com)
- The best-paid 10 percent make $76,000, while the lowest-paid 10 percent make $34,000. (zippia.com)
External Links
How To
How to join hardwood without using nails
Woodworking is a favorite hobby. It's fun and relaxing because you can use your hands to make something useful from wood. You may need to join two pieces without the use of nails. This article will show you how to do it to make your woodwork projects look great.
Before joining the pieces of wood together, you will need to first trim any edges. Do not leave any sharp corners as they could cause problems down in the future. Now it's time to start glueing your boards together.
If you are working on hardwood, you should only use glue on one side. For softwoods like cedar and pine, glue should be applied to both sides. Apply the glue to the boards and press them down until they are securely attached. Be sure to let the glue dry before you move on to the next step.
After you glue your boards together, drill holes at the joints where screws will be inserted. You can choose the type of screw to determine the size of your holes. If you are going to use a half-inch wood screw, you will need to drill at least 3/4 inch deep.
After drilling the holes, you can drive the screws into your board's backside. Do not hit the boards' front surfaces. It will ruin the finish. Avoid hitting the screws' ends too often when driving screws. This will help prevent splitting of the end grain.
Now that your project is finished, you'll want to protect it from the elements. To do this, you can seal the entire furniture piece or just cover the top. You'll want a product that lasts for many years. There are many options: oil-based varnishes; polyurethane; shellac; lacquer.
These products can be found in most home improvement shops. You should make sure you are getting the right type for the job. Remember that some finishes can be toxic, so you should not use them indoors. When handling certain finishes, wear protective gear.