
You've found the right place if you're looking for new patterns to use your scroll saw. Scroll saw patterns can be as easy as you think. There are two types of scroll saw patterns: simple and advanced. Once you've mastered the basics of scroll saw pattern cutting, you can move on to more complicated projects. Tutorials for Backerboards as well as Blades will help you get going.
Simple patterns
You don't have to be a professional scroll saw carver if you are just starting out. Simple patterns for scroll saws can help you quickly create beautiful pieces. There are many designs you can use to create your scrollsaw patterns. The most important thing to keep in mind is that you shouldn't hand trace the patterns on the wood because even the slightest movement can cause damage. You can print out your patterns to prevent this. Printing scroll saw patterns is difficult and requires a printer.
A template made from wood can be used to create ornaments for your house. You can practice with simple patterns on a scroll saw, but more complicated patterns will require advanced skills. To add some class to your living rooms, you might make a wooden topper. You can even use a wooden template to make a simple Christmas tree, which you can then use as a template. A good scroll saw, some tabletop or worktop and a few extra hours are all you will need.
Once you have mastered the art of cutting with a scroll saw, you should look into how you'll be able to make different shapes and fonts. Whether you're working with a single piece or hundreds, you can start with simple patterns for a scroll saw. There are so many types of patterns available for scrolling that you won't know which ones to start with! You can find them all over the internet, including lists of the best scroll saws.
Backerboards
A good quality Baltic Birch plywood is recommended when creating your own scrollsaw backer board. These boards come in thicknesses of 1/8" (3mm) up to 6mm. They are easy to cut using your scroll saw. You can also make your own Baltic birch plywood by spray painting plywood or plexiglass. No matter the material, ensure you are familiar with proper setup and maintenance.
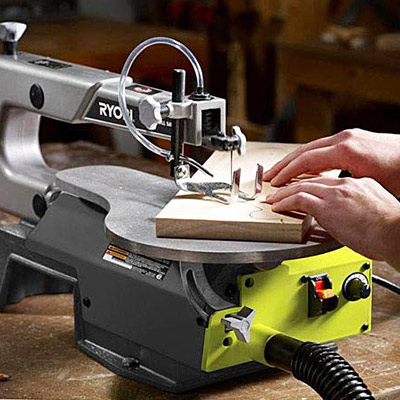
The first step in any project is to create a solid backerboard. Next, you will need to pick your blades. There are many sizes to choose from, so it's important that you know what size you need. A good quality backerboard will also help protect your scroll saw blade from damage. Make sure you consider the material for your scroll saw's tables. These boards are affordable, but can prevent your scrollsaw's blade from catching on.
Backerboards can be an important accessory to your scroll saw. By preventing wood from bowing during the cutting process, they help to prevent splintering. To give the edge a smooth look, you can sand down the backer boards. To prevent splintering, you can also cut wood that isn't very strong. If you want to use a scroll saw to make wooden clock inserts, this guide can help you get started.
Blades
Scroll saw blades come in many shapes and sizes. Most common are the spiral and crown tooth. The crown tooth blades are a pair of teeth that have the same side as the teeth. This makes them ideal for cutting smooth plastic. Spiral blades are twisted into a spiral shape and can cut in any direction. They are excellent for cutting forms with sharp corners or abrupt changes of direction. Scroll saw blades are made from a variety of materials like steel, plastic and wax.

A standard-toothed blade is the most widely used blade available for a Scroll Saw. They will have the same spacing between their teeth. The blade's edge will have a ridge on one side to provide a cutting effect. Therefore, when changing the blade, you will need to face one of the edges forward. The scroll saw blade is not easy to change. However, a few basic tips will ensure that your woodworking experience is as smooth and pain-free as possible.
Scroll saw blades are used to create intricate cuts from a variety materials, such as wood, metal, or plastic. For this reason, it is important to have good blade tension and alignment. Finer blades will cut hardwood better than thicker blades. Metal material can be cut with thicker blades. Make sure to buy the correct blade size and tension for your scroll saw to maximize its potential. This will allow you to ensure smooth cuts every time.
FAQ
Where can you find free woodworking blueprints?
Free woodworking plans are available online. You don't even need to buy books or magazines. All you need to do is search Google. You can search Google for "free woodworking" and hundreds of websites will appear allowing you to download plans.
How much should a skilled woodworker earn per hour?
The hourly rate of a professional woodworker depends on many factors including experience, skill level, availability, location, etc.
The hourly average rate for skilled woodworkers runs between $20-$50.
A less skilled woodworker might charge as low as $10 per hour.
Can I succeed in woodworking if I'm a genius?
No. No. Woodworking isn't rocket science. To create stunning works of art, anyone can learn to use basic power tools.
Where can I begin with woodworking
The best way to learn how to build furniture is by building furniture. While you will need tools and make mistakes, you will eventually master the art of building furniture.
Start by choosing a project you'd like to complete. It could be something as simple as a box or as elaborate as a full-scale entertainment center. After you have decided on a project to work on, contact a local woodworker that specializes in this type of work. Ask them for their advice about the tools and where they can be found. Maybe you can ask the person if they know of anyone who does this sort of work.
Can I refinish my own furniture?
Yes! There are plenty of ways to refinish old pieces of furniture without having to pay a pro. Here are some examples:
To remove stains and scratches, use sandpaper. Finally, use a clean cloth or sponge to clean the surface.
Apply clear polyurethane varnish. Let dry completely before moving furniture around.
Acrylic paint is a great way to paint furniture.
Use stain instead of paint. You can give your furniture a rich appearance with stain.
Shellac wax can be applied. Applying wax will give the wood shine and protection.
Statistics
- The best-paid 10 percent make $76,000, while the lowest-paid 10 percent make $34,000. (zippia.com)
- Woodworkers on the lower end of that spectrum, the bottom 10% to be exact, make roughly $24,000 a year, while the top 10% makes $108,000. (zippia.com)
- In 2014, there were just over 237,000 jobs for all woodworkers, with other wood product manufacturing employing 23 percent; wood kitchen cabinets and countertop manufacturing employing 21 percent. (theartcareerproject.com)
- If your lumber isn't as dry as you would like when you purchase it (over 22% in Glen Huey's opinion…probably over 10-15% in my opinion), then it's a good idea to let it acclimate to your workshop for a couple of weeks. (woodandshop.com)
External Links
How To
How to stain wooden surfaces
Stain wood is a process that involves applying chemicals to the surface of wood, which changes its color. This chemical reaction causes wood to turn from whiteish to brownish. While oak is the most widely used type of wood for staining purposes, other types of wood are also available.
There are many methods to apply stain to wood surfaces. You can mix the stain with a solvent, such as turpentine, and spray it onto the wood. Others use a solution made up of water and dye, which is then applied directly onto the wood. You can mix stains into varnishes or paints to make them part of your finish coat.
Preparing the surface for staining wood is the first step. To apply the stain, clean the wood completely. Sanding smoothens scratches and rough spots. The next step is to determine the type of stain you would like to use. There are two main types of stain: non-penetrating and penetrating. Penetrating colors penetrate deeper into wood than those that are non-penetrating. This makes them more suitable for darker colors, such as mahogany. Non-penetrating oils work best when used with light colors, like maple.
After deciding on the type of stain, you want to apply, prepare your tools. Paintbrushes are great for applying stain because they allow you to evenly spread the liquid across the surface. A few rags are also handy to clean up any spillages after you have finished painting. If you plan to mix the stain yourself, make sure you have enough containers available to hold the different components of the mixture.
After you have prepared your materials for staining, clean the area. Clean the area with soap and warm water to get rid of dirt and grime. You can wipe down the entire furniture using a damp rag with clean water. You should remove any debris, especially if your plan is to stain darker wood.
Apply the stain next. Start at one end of the piece of furniture and brush or spray the stain onto the wood. Slowly and carefully work your way along the grain to reach the opposite end. Make sure that the stain does not drip off the edge of the wood. Before you proceed with the next steps, let the stain dry completely.
A coat of clear polyurethane sealing agent is applied to protect the paint. Three coats of polyurethane sealing agent are required. Allow the third coat, which should dry overnight, to dry before sanding.