
A trimming router is a miniature router that can be used for various tasks, including edge trimming. These routers can also be used as drill bits or signs. These devices may not accept bits that are smaller in size than the baseplate. In these situations, a smaller router bit might not be practical. This article will discuss the different uses of a router for trimming. After reading this article, you will be able to choose the right type of router for your specific needs.
Trim routers look like regular routers but are smaller.
There are two types, straight and plunge, of trim routers. Both are useful for light-duty work, but plunge routers are heavier than trim routers and require two hands to operate. The plunge router's motor is beefy enough to muscle through heavier materials. The motor in the plunge router is much more powerful than those found in trim routers. A plunge router is also harder to maneuver than a trim router, which is why plunge routers are often more expensive.
They can handle a very small profile bit to trim edges
There are two main types of trim bits: double and single rounding. Double rounding over bits creates a smaller profile. Single rounding over bits cuts the top and bottom edges simultaneously. The project's finish is preserved by single rounding, while double-rounding creates a decorative edge. Single rounding over bits are less expensive than double rounding over bits, but be sure to choose the right one for your needs.
These can be used for drilling holes
They are small in footprint making them suitable for narrow aprons and small box sides. The router features a cutting edge with a solid carbide polishing bit. They can also drill holes. A template is a simple way to drill a hole into a veneer surface. You can use the router's 1/4 inch up-cutting spiral blade to drill a hole if you don't have a template.
They can be used in signs
You can create your own signage using many different materials. To create your signage, you can use different types or paper. To give your sign a professional appearance, you could use glossy photopaper. Photo paper can be used to print many different types of photos. It can also adhere to different surfaces, so it is easier than you think to use photo paper for your signage. Be careful with the material you choose because it can warp under extreme temperatures.
They can also be used to make mortises
A woodworking router can be used to make mortises. This tool comes with many functions. It can make mortises or tenons. By using a template, you can create any shape you desire with this tool. You might see furniture with rounded corners at its top and bottom, along with an ornamental cut at the bottom and an inverted D shape at its top. In such cases, you can draw a straight line along the top edge of the furniture and cut short sections on each end of the "D".
They can also be used to make grooves
Routers are handheld machines that use a bit to cut grooves. For different purposes, there are several types of router bits. These include cutting straight grooves and cutting decorative V-grooves. You can buy router bits separately or in sets from hardware stores. A user can select one of the available options by using the menu at the top of the tool. The following are some common ways to use a router.

They can also be used to make chamfers
Chamfers can be created by adding or removing flat sections from an edge of a form. This process is usually applied to a single or multiple edges. To create a chamfer, first select an edge to chamfer, then the offset distance. You can then specify the distance and angle between them. In SolidFace, you can choose to chamfer the edges of a shape by pointing to a reference point or straight line. The chamfer can be viewed before you begin machining.
They can also be used to trim lamina edges
PVA glue and a suitable contact adhesive are used to trim edges of laminate board. Clean the old glue residue with rubbing alcohol. Use a towel or wet paper towel to wipe away any excess glue. Apply the new glue using long smooth strokes. Wait twenty minutes for the glue to harden and form beads. After the glue has hardened, transfer the laminate to its new spot. Repeat the process if necessary, making sure to use the same amount of glue on both the edge and back.
FAQ
How do I get started as a woodworker?
Woodworking is an art. It requires patience. Learning how to use the various tools and techniques necessary for woodworking takes patience.
There are many different types of woodworking equipment available on the market today. Some people prefer using power tools while others prefer hand tools.
While you have the option to pick what you like, it is essential that you get the right tool for the job. If you don't have any experience, you may consider starting with a basic set of hand tools.
You might also consider learning how to use the router to create intricate shapes from wood. These are available at most hardware stores.
How can I learn basic skills in woodworking?
It is an excellent way to learn how to build furniture. You can make a simple bench yourself. This project can be done with any kind of wood that you have at home. You don't need to know which type of wood you should use. Instead, get some pine boards at Lowes or Home Depot. Once you have built your bench, you will need to sand it off and then finish it with a stain/varnish.
How often do I need to buy new supplies
You may have to replace certain tools. Sharpening hand tools is a must. And if you're using power tools, you'll need replacement parts periodically. Avoid buying too many products at once. Spread your purchases out over several months.
What should a woodworker be paid per hour?
The hourly rate for a professional woodworker varies depending on many factors, including skill level, experience, availability, location, and other variables.
An hourly wage for skilled woodworkers is between $20 and $50.
An hourly rate of $10 for a less skilled woodworker could be possible.
Can this be a way to make money?
Yes! In fact, many woodworkers already do. According to U.S. Bureau of Labor Statistics (BLS), woodworkers earned a median annual salary of $34,000 in May 2012. That's higher than the national average of $31,000 per year.
Statistics
- Most woodworkers agree that lumber moisture needs to be under 10% for building furniture. (woodandshop.com)
- If your lumber isn't as dry as you would like when you purchase it (over 22% in Glen Huey's opinion…probably over 10-15% in my opinion), then it's a good idea to let it acclimate to your workshop for a couple of weeks. (woodandshop.com)
- Woodworkers on the lower end of that spectrum, the bottom 10% to be exact, make roughly $24,000 a year, while the top 10% makes $108,000. (zippia.com)
- Average lumber prices rose about 600 percent between April 2020 and May 2021. (familyhandyman.com)
External Links
How To
How to make wooden joints
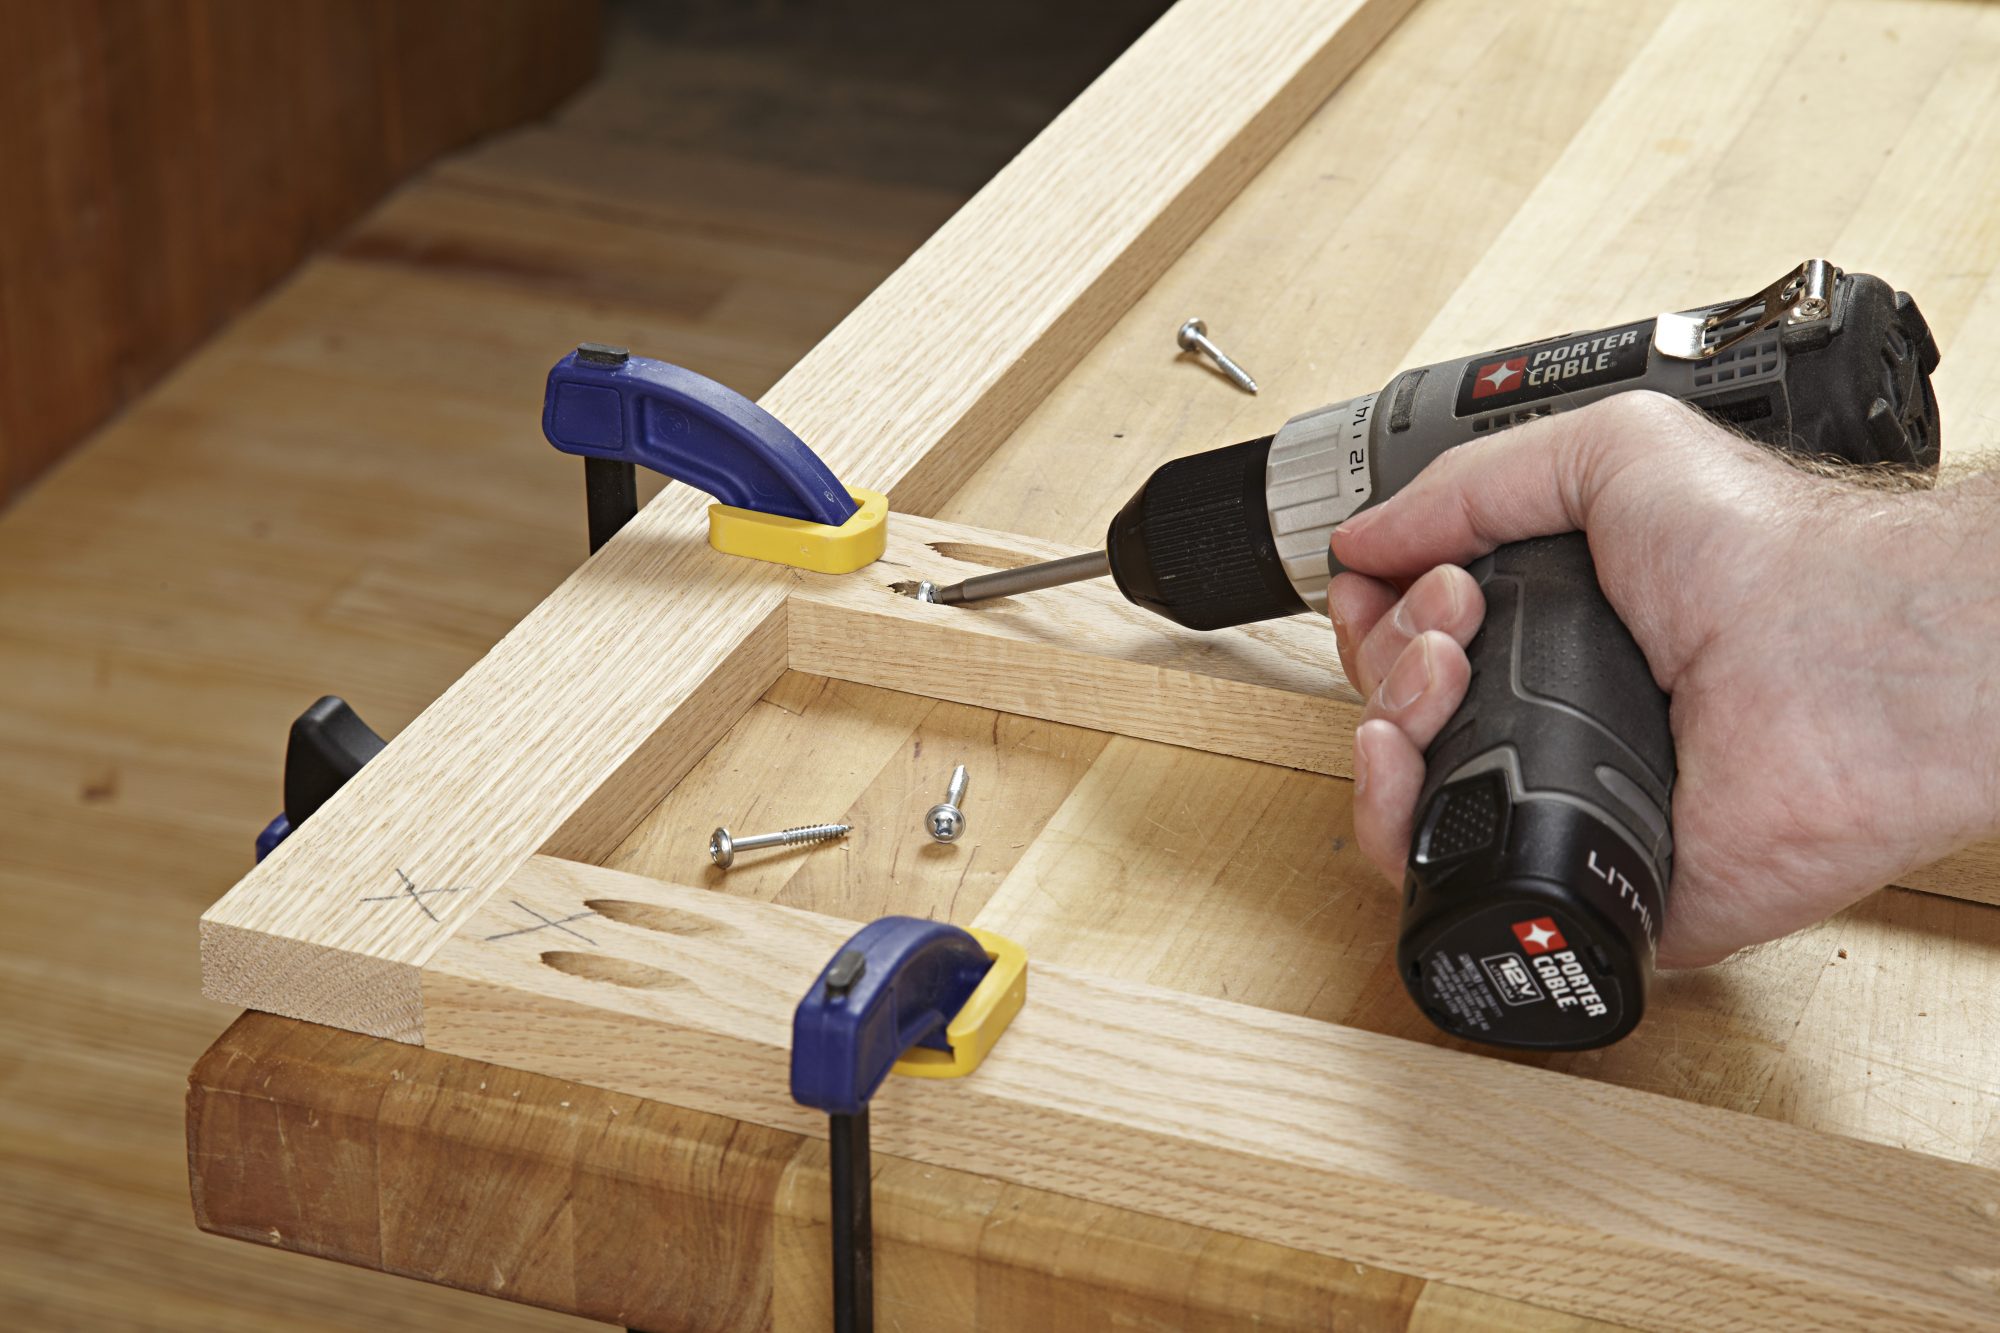
This tutorial will demonstrate how to join two pieces together of wood. The "pocket hole joint" is a method whereby we drill holes into the wood and glue them together. If your wood has a straight grain, smooth surface, you can use this method. You may want to consider other methods, such as dowel joining. Here are the steps
-
Drill Pocket Hole Joints. Measure and mark the location where you would like to place the pocket hole joint. You will then drill 3/4" deep holes through each piece of wood with a jigsaw, handheld drilling machine, or hand-held drill.
-
Sand Smooth. Sanding the wood's edges will ensure that the joint doesn't split.
-
Glue the two sides of the wood together. Apply glue to both sides of the wood. Allow it to sit for approximately 5 minutes before you clamp the pieces together.
-
Clamp the Pieces Together. After the glue has dried completely, you can clamp the pieces together until they are flush.
-
Trim Joinery. After the glue dries completely, trim off any excess wood around the joint.
To be able to turn the pieces inside-out, leave enough room between them.